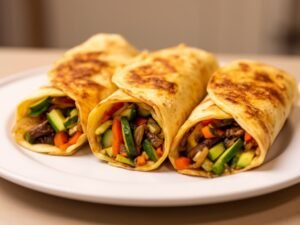
Have you ever craved a meal that’s bursting with flavor, ready in under 30 minutes, and perfect for everything from busy weeknights to picnic adventures? That’s exactly what these pita pocket fillings deliver. Imagine warm, fluffy pita bread stuffed to the brim with juicy grilled chicken, crisp veggies, and a creamy yogurt sauce that ties it all together. It’s the kind of dish that feels indulgent yet light, making it my go-to for quick lunches or casual dinners.
Table of Contents
What sets these pita pocket fillings apart is their versatility and fresh appeal. The grilled chicken gets a zesty marinade of yogurt, lemon, and warm spices, while colorful bell peppers, cucumbers, and tomatoes add crunch and vibrancy. Drizzled with a tangy dip sauce, every bite is a delightful mix of textures and tastes. Whether you’re packing them for work or serving at a family gathering, these pita pocket fillings never disappoint.
I remember the first time I whipped these up on a hectic Sunday—it was a game-changer. No fuss, no oven required, just a skillet and some fresh produce. They’re ideal for meal prep too, holding up beautifully throughout the week. If you’re tired of boring sandwiches, these pita pocket fillings will refresh your routine with Mediterranean-inspired goodness.
These fillings shine because they’re customizable. Swap in seasonal veggies or adjust the spice level to your liking. Paired with soft pita pockets, they create portable, mess-free meals that kids and adults alike devour. Dive into this recipe, and you’ll see why pita pocket fillings have become a staple in so many kitchens—simple, satisfying, and seriously delicious.
Ingredients for Pita Pocket Fillings
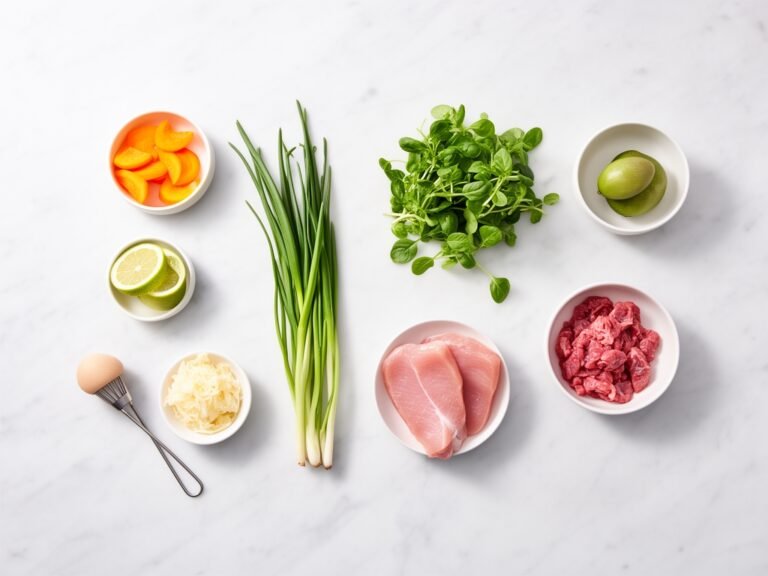
Choosing the right ingredients is key to perfect pita pocket fillings. Fresh, high-quality chicken ensures juiciness, while vibrant veggies like bell peppers and cucumbers provide crunch without sogginess. The yogurt-based marinade tenderizes the meat and infuses bold flavors, making every pita pocket filling irresistible.
These selections work seamlessly because they balance protein, veggies, and sauce for a complete meal. Spices like cumin and paprika add warmth, complementing the cool tzatziki. Opt for whole wheat pitas for extra fiber—they hold up well to generous pita pocket fillings without tearing.
Chicken Marinade:
– 1.5 lbs boneless chicken breast, cut into thin 1-inch strips
– 1 cup plain yogurt
– 1/3 cup olive oil
– 2 tbsp fresh lemon juice
– 1 tbsp paprika
– 1 tbsp red chili flakes (adjust for heat)
– 1.5 tsp salt
– 1 tbsp minced garlic
– 1 tbsp ground coriander
– 1 tbsp ground cumin
– 1/2 tsp ground cinnamon
– 1/2 tsp black pepper
Veggie Filling:
– 1 red bell pepper, thinly sliced
– 1 yellow bell pepper, thinly sliced
– 1 large cucumber, diced
– 1 pint grape tomatoes, halved
– 1/2 red onion, thinly sliced
– 2 cups fresh spinach leaves
– 1/4 cup chopped fresh parsley
Dip Sauce (Tzatziki-Style):
– 1 cup plain Greek yogurt
– 1/4 cup mayonnaise
– 2 tbsp lemon juice
– 1 tbsp minced garlic
– 1 tbsp chopped fresh dill
– Salt and pepper to taste
To Assemble:
– 6 whole wheat pita breads
– Optional: Sliced olives, feta cheese crumbles
For substitutions, use turkey strips instead of chicken for a leaner option, or chickpeas for a plant-based twist. Shop for firm veggies to avoid excess moisture in your pita pocket fillings. Buy yogurt in bulk for creaminess without curdling.
Equipment Needed
A few essential tools make preparing pita pocket fillings a breeze. A sharp knife and cutting board ensure even slicing for uniform cooking. A large mixing bowl for marinating allows flavors to meld perfectly.
A non-stick skillet or grill pan is crucial for searing the chicken without sticking, preserving those juicy pita pocket fillings. Measuring spoons and cups guarantee precise seasoning, while a wooden spoon helps toss everything effortlessly.
– Sharp chef’s knife
– Cutting board
– Large mixing bowl
– Whisk
– Non-stick skillet or grill pan
– Tongs
– Measuring cups and spoons
– Wooden spoon or spatula
Prep Time & Cook Time
Prep Time: 15 minutes
Cook Time: 15 minutes
Total Time: 30 minutes (plus 30 minutes marinating)
Servings: 6
Difficulty: Easy
Marinating ahead saves time, letting flavors deepen for superior pita pocket fillings. Prep veggies while chicken rests, and you’ll have dinner on the table fast. These timings assume basic chopping skills—multitask to shave off minutes.
Step-by-Step Instructions for Hummus Pita Pockets
Creating these pita pocket fillings starts with marinating for maximum flavor infusion. The yogurt tenderizes the chicken, while spices build that signature zest. Follow these steps closely for fluffy pitas brimming with goodness—perfect for hummus pita pockets too.
Warm your pitas just before stuffing to enhance flexibility. Layer veggies first to prevent sogginess, then add protein and sauce. This method ensures balanced hummus pita pockets every time.
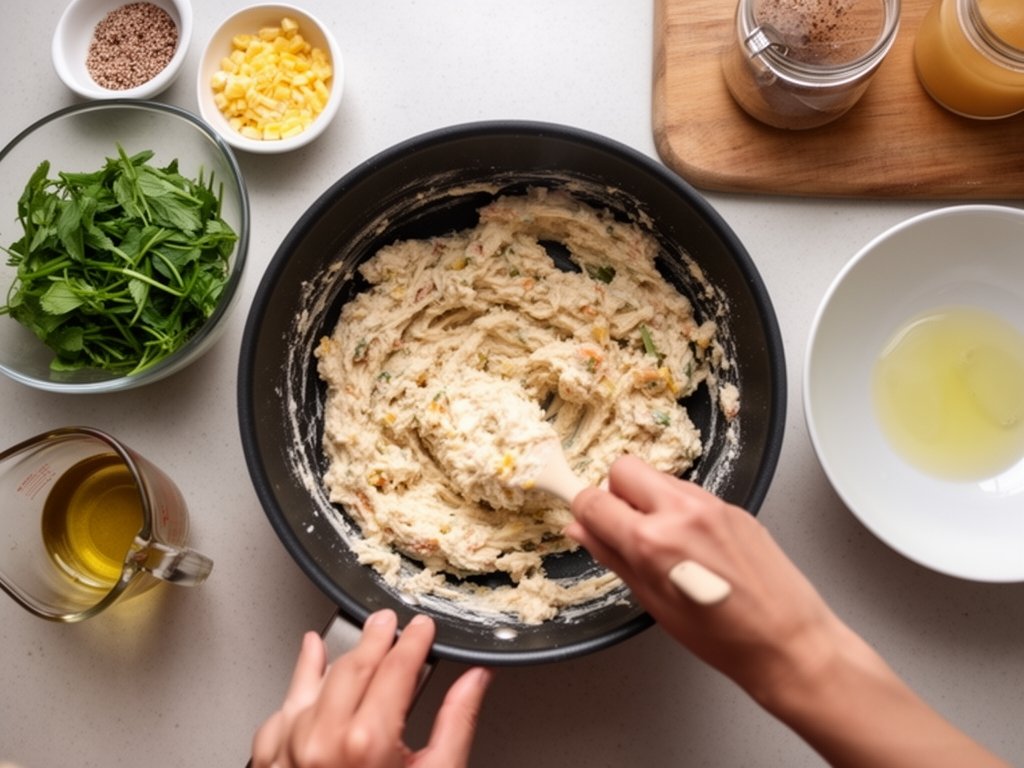
1. In a large mixing bowl, combine yogurt, olive oil, lemon juice, paprika, chili flakes, salt, garlic, coriander, cumin, cinnamon, and black pepper. Whisk until smooth—this marinade is the heart of your pita pocket fillings, tenderizing chicken in just 30 minutes. Add chicken strips, toss to coat evenly, and cover. Refrigerate for at least 30 minutes or up to 2 hours for deeper flavor. Don’t skip this; it locks in juiciness.
2. While chicken marinates, prepare the veggie filling. Slice bell peppers, dice cucumber, halve tomatoes, thinly slice onion, and chop parsley. Toss everything in a bowl with spinach. This crisp mix adds crunch to your pita pocket fillings—keep it chilled to maintain freshness and prevent wilting.
3. Make the dip sauce by mixing Greek yogurt, mayonnaise, lemon juice, garlic, dill, salt, and pepper in a small bowl. Stir until creamy. Taste and adjust seasoning. This tzatziki-style sauce elevates hummus pita pockets with cool tanginess—chill it to let flavors meld.
4. Heat a non-stick skillet or grill pan over medium-high heat. Add a drizzle of olive oil. Remove chicken from marinade, shaking off excess, and add to the hot pan in a single layer. Cook for 4-5 minutes per side until golden and cooked through (internal temp 165°F). Use tongs to flip—avoid overcrowding for even searing in your pita pocket fillings.
5. Let cooked chicken rest on a cutting board for 3-5 minutes. This redistributes juices, ensuring moist bites. Coarsely chop into bite-sized pieces. Pro tip: Resting prevents dryness, a common pitfall in rushed pita pocket fillings.
6. Warm pitas in a dry skillet over medium heat for 1-2 minutes per side, or microwave wrapped in a damp towel for 20 seconds. This softens them for easy stuffing without tearing—essential for perfect hummus pita pockets.
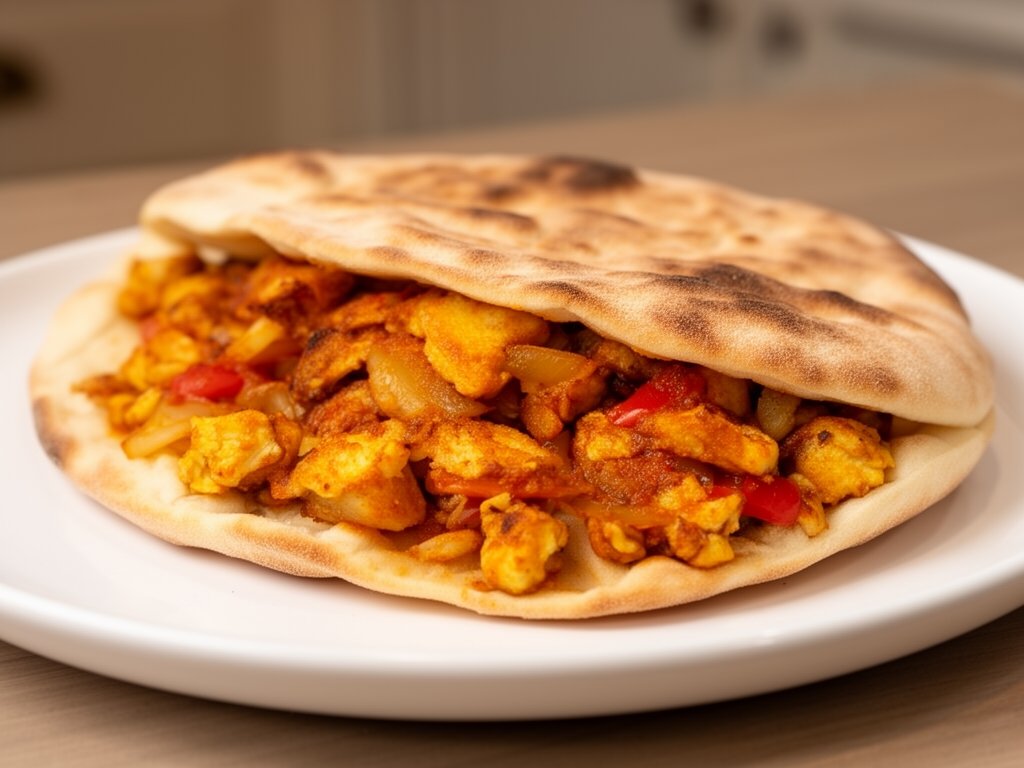
7. Cut each pita in half to create pockets. Gently open with your fingers or a knife. Spread 1-2 tsp dip sauce inside each half to coat—this prevents sogginess and boosts flavor in pita pocket fillings.
8. Start stuffing: Layer 1/4 cup veggie mix into each pita half first. This base absorbs sauce without overwhelming the pocket. Add chopped chicken next, about 1/2 cup per half, packing gently.
9. Drizzle 1 tbsp dip sauce over the chicken and veggies inside each pita pocket filling. Sprinkle parsley or optional feta for freshness. Press lightly to settle contents.
10. Serve immediately for the crispiest hummus pita pockets. If prepping ahead, wrap tightly—these hold up well. Enjoy the explosion of flavors!
11. For extra flair, grill stuffed pitas lightly for 1 minute to toast exteriors, enhancing texture in your pita pocket fillings.
12. Repeat assembly for all pitas, ensuring even distribution of fillings for consistent meals.
Nutritional Information
These pita pocket fillings pack a nutritious punch, blending lean protein from chicken with fiber-rich veggies. Each serving delivers about 25g protein, supporting muscle repair and satiety. Yogurt adds probiotics for gut health, making this a smart choice for balanced eating.
Veggies like bell peppers and tomatoes provide vitamins A and C, boosting immunity and skin health. Spices offer antioxidants, while whole wheat pitas contribute complex carbs for steady energy. At around 400 calories per serving, these pita pocket fillings fuel without weighing you down.
The dip sauce enhances calcium from yogurt, aiding bone strength. Low in saturated fats, this recipe promotes heart health through olive oil’s healthy monos. It’s a wholesome way to enjoy flavorful meals daily.
Per Serving (1 stuffed pita half):
– Calories: 380
– Protein: 25g
– Carbs: 35g
– Fiber: 6g
– Fat: 15g
– Vitamin C: 80% DV
– Iron: 15% DV
Serving Suggestions & Variations
Pair these pita pocket fillings with a crisp Greek salad of cucumbers, olives, and feta for a full Mediterranean spread. Add lemon wedges on the side to brighten flavors—perfect for summer lunches.
For seasonal twists, use roasted zucchini in fall or grilled eggplant in summer. These swaps keep pita pocket fillings fresh and exciting year-round. Serve with tabbouleh for extra grain goodness.
Try air-frying chicken instead of pan-searing for crispier texture in hummus pita pockets. Or bake at 400°F for 10 minutes. These methods vary cooking without sacrificing taste.
Experiment with lamb strips for a heartier version or chickpeas for plant power. Top with tahini drizzle for nutty depth—these variations make pita pocket fillings endlessly adaptable.
Expert Tips & Tricks for Pita Pocket Fillings
Mastering pita pocket fillings comes down to technique and timing. Marinate longer for bolder taste, and always rest proteins—these pros ensure restaurant-quality results at home.
1. Pat chicken dry before marinating to help spices adhere, preventing steaming in the pan. This yields caramelized edges crucial for flavorful pita pocket fillings. Aim for room-temp meat pre-cook to speed even cooking.
2. Choose firmer veggies like English cucumbers to minimize water release, keeping your pita pocket fillings crisp. Salt and drain onions 10 minutes ahead—they’ll mellow without sogginess.
3. Warm pitas properly: Steam or microwave briefly to avoid cracking when stuffing. This simple step transforms stiff bread into pliable vessels for perfect pita pocket fillings.
4. Layer strategically—veggies first, then protein, sauce last. This order in hummus pita pockets maintains structure and prevents mushy textures during transport.
5. Boost flavor with a pinch of sumac or za’atar on veggies. These Middle Eastern spices add citrusy tang, elevating basic pita pocket fillings to gourmet levels effortlessly.
6. For meal prep, assemble without sauce and store components separately. Add fresh dip right before eating to preserve crunch in your pita pocket fillings.
7. Use Greek yogurt in sauces for thickness—it clings better than regular, ensuring every bite in pita pocket fillings is saucy and satisfying.
8. Grill outdoors for smoky notes that mimic street food. Brush with marinade mid-cook for glossy, juicy chicken in superior pita pocket fillings.
9. Freeze extra marinade in ice cube trays for quick future batches. Thaw as needed—these hacks streamline pita pocket filling prep.
Common Mistakes to Avoid
Over-marinating chicken beyond 2 hours can make it mushy due to yogurt’s acidity. Stick to 30-60 minutes for tender, not tough, pita pocket fillings. Solution: Set a timer and drain well before cooking.
Skipping the resting step post-cook leads to dry chicken. Juices redistribute in 5 minutes—always wait to chop for moist pita pocket fillings that impress.
Using soggy veggies ruins texture. Avoid watery produce; pat dry and chill ahead. This keeps pita pocket fillings vibrant and crunchy.
Overstuffing pitas causes tears. Fill halfway max, press gently—patience yields intact, portable hummus pita pockets.
Neglecting to warm pitas results in brittle bread. Heat briefly for flexibility, ensuring easy stuffing without frustration.
Crowding the pan steams instead of sears chicken. Cook in batches for golden crusts vital to tasty pita pocket fillings.
Forgetting to taste sauce before assembly means bland results. Adjust salt and lemon— a quick fix for balanced hummus pita pockets.
Storage & Reheating Instructions
Store assembled pita pocket fillings in airtight containers in the fridge for up to 3 days. Keep sauce separate to avoid sogginess—recombine fresh for best taste.
For longer storage, freeze unfilled components: cooked chicken and veggies in freezer bags up to 2 months. Thaw overnight; this preserves quality in pita pocket fillings.
Reheat chicken in a skillet over medium heat for 2-3 minutes, or microwave 30-60 seconds. Warm pitas separately to revive fluffiness without toughness.
Food safety first: Cool fillings quickly post-cook, refrigerate promptly. Reheat to 165°F—safe, delicious pita pocket fillings every time.
Conclusion
These pita pocket fillings are a revelation—quick, flavorful, and endlessly versatile for any meal. From marinated chicken to crisp veggies, every element shines, making them a must-try for home cooks.
Whip up a batch this week and transform ordinary lunches into something special. Your family will thank you—grab those pitas and get stuffing!
FAQs
Can I make pita pocket fillings ahead for meal prep?
Yes, prepare chicken and veggies separately up to 3 days ahead. Store in fridge; assemble fresh for crisp hummus pita pockets. This keeps textures perfect and flavors intact—ideal for busy weeks.
What can I substitute for chicken in pita pocket fillings?
Use ground turkey, beef strips, or chickpeas. Marinate similarly for 30 minutes. Turkey mimics texture closely, ensuring juicy pita pocket fillings everyone loves.
How do I prevent soggy hummus pita pockets?
Layer dry veggies first, add sauce last, and use parchment-lined containers. Warm pitas before stuffing—these tricks maintain crunch in every pita pocket filling.
Are these pita pocket fillings freezable?
Absolutely—freeze cooked chicken and veggies for 2 months. Thaw in fridge overnight, reheat gently. Pit as don’t freeze well, so assemble post-thaw for fresh pita pocket fillings.
Can I grill the chicken for pita pocket fillings?
Yes, preheat grill to medium-high. Cook 4-5 minutes per side. The smokiness enhances flavors, perfect for outdoor hummus pita pockets on warm days.
What sides pair best with pita pocket fillings?
Try tabbouleh, cucumber yogurt salad, or roasted chickpeas. These add variety without overpowering the star pita pocket fillings.
How spicy are these pita pocket fillings?
Mild-medium; adjust chili flakes to taste. Omit for kids, or add cayenne for heat—customize for all in hummus pita pockets.
Can I use store-bought tzatziki for pita pocket fillings?
Sure, it saves time and works great. Choose thick varieties to mimic homemade—stir in extra lemon for zing in your pita pocket fillings.
How to scale this recipe for a crowd?
Double ingredients for 12 servings; marinate in batches. Prep veggies ahead—these pita pocket fillings shine at parties.
What’s the shelf life of assembled hummus pita pockets?
Best within 24 hours in fridge. For longer, keep components separate up to 3 days—ensures peak freshness in pita pocket fillings.